
A slow cooker bone broth can develop a full savory flavor and a softly gelatinous texture without being greasy or muddy. The most common problems come from an overloaded cooker, too much water, frequent lid lifting and slow cooling after cooking.
This recipe uses raw chicken backs, necks and wings because they provide a useful combination of bones, joints, connective tissue and flavor. The pieces roast first, then cook with vegetables and 10 cups of water in a 6-quart slow cooker. Starting on high for one hour brings the contents up to heat promptly; a long low cook extracts flavor without requiring attention at the stove.
The method was developed through culinary research and editorial review. A cold broth may set firmly, wobble softly or remain liquid depending on the exact bones, water content and final concentration. Gel is a texture outcome—not a safety test or a guarantee of a particular nutrient level.
If you would rather begin with a cooked bird, save the clean chilled bones from the whole chicken air fryer recipe and follow the cooked-carcass variation below. Use the finished broth in rice, soup or a pan sauce for sliced air fryer turkey tenderloin.
Bone broth, stock and regular broth
The names overlap in home kitchens. Stock is generally made from bones and connective tissue, while broth may contain more meat and be seasoned for drinking or serving. “Bone broth” usually describes a long-cooked, bone-forward stock intended to have concentrated flavor and body.
This recipe is seasoned lightly so it can function as an ingredient. Add more salt only when serving it directly or when you know how much sodium the final dish needs.
The vinegar is optional and used in a small amount. It does not make the broth taste sour, and adding more does not guarantee stronger gel or substantially different nutrition.
Why this slow cooker method works
- Joint-rich chicken parts provide collagen. Wings, necks, backs and feet contribute more body than bare breast bones.
- Roasting develops deeper flavor. Browned proteins and vegetables give the finished broth a savory roasted profile.
- Water is measured. Covering bones with gallons of water produces a weak broth that needs extensive reduction.
- The cooker starts on high. The refrigerated ingredients move through the warm-up period efficiently before the long low stage.
- The lid stays closed. Steam and heat remain inside while the cooker maintains its intended temperature.
- Gentle straining limits cloudiness. Pressing and mashing forces fine particles into the liquid.
- Shallow containers cool faster. A full hot crock should never be placed directly into the refrigerator.
Ingredients
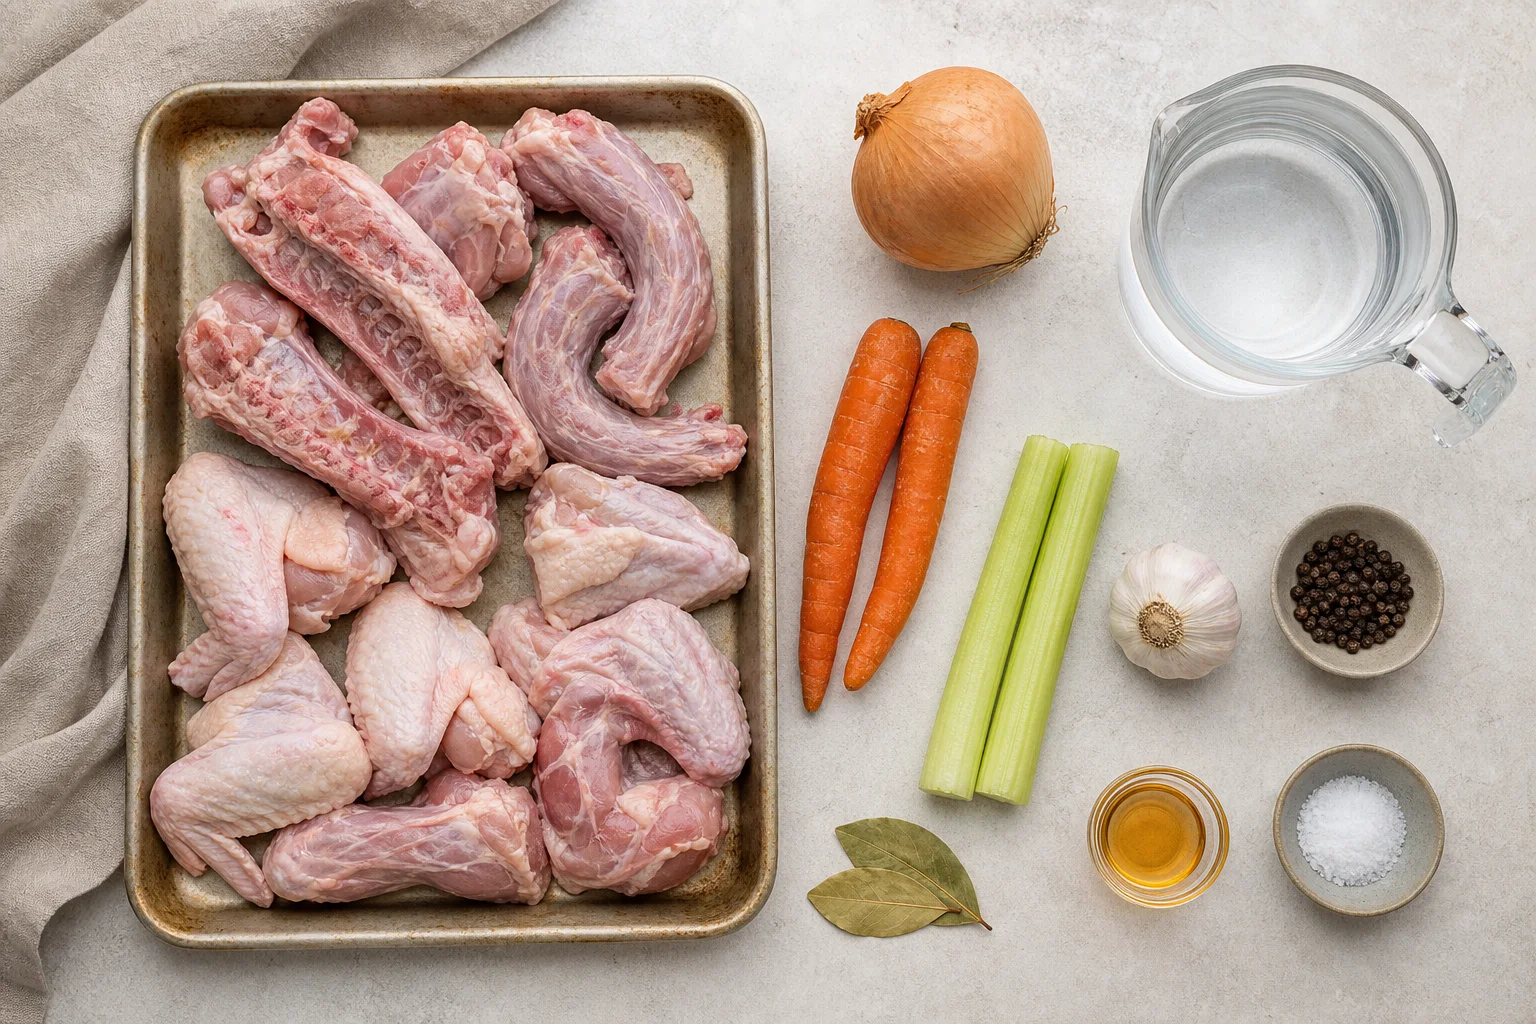
- 4 pounds thawed raw chicken backs, necks and wings
- 1 large yellow onion, unpeeled and quartered
- 2 medium carrots, scrubbed and cut into 2-inch pieces
- 2 celery ribs, cut into 2-inch pieces
- 1 head garlic, halved crosswise
- 2 bay leaves
- 1 teaspoon whole black peppercorns
- 2 teaspoons apple cider vinegar, optional
- 10 cups cold water, plus only enough extra to barely cover if needed
- 1 teaspoon Diamond Crystal kosher salt, optional and adjustable after straining
Ingredient notes and substitutions
Chicken bones and joints: A mixture of backs, necks and wings gives reliable body. Ask a butcher for soup bones, or save raw backs and wing tips from breaking down whole chickens. Use fully thawed pieces; USDA advises thawing meat and poultry before slow cooking.
Chicken feet: Replace up to 1 pound of the bones with cleaned chicken feet for more gelatin. Buy feet prepared for cooking, remove any remaining outer yellow membrane and trim nails if the processor has not done so. Their use is optional.
Cooked carcass: Two chilled carcasses from roasted 3- to 4-pound chickens can replace the raw bones. Remove most skin, stuffing, lemon pieces and heavily seasoned meat. A cooked carcass usually needs no separate roasting.
Onion skin: Clean dry onion skin adds amber color. Discard slimy or dirty outer layers. The unpeeled onion is optional; peeled onion makes a paler broth.
Carrots and celery: These add sweetness and aroma. Large pieces withstand long cooking better than a small dice, though they will still be discarded after straining.
Garlic: Halving a whole head exposes the cloves without leaving tiny minced pieces to strain. Omit it for a more neutral broth.
Apple cider vinegar: Two teaspoons add mild acidity. Lemon juice or white wine vinegar can replace it, or it can be omitted entirely.
Salt: Keep the initial amount low, especially if broth will be reduced. Packaged or previously seasoned bones may already contain sodium.
Choosing the right slow cooker and fill level
Use a 6-quart slow cooker for this ingredient amount. The bones and vegetables should fit below the manufacturer’s maximum line after water is added. Do not pack the crock completely full; the contents need room for hot liquid circulation.
A 5-quart model requires a smaller batch. Reduce bones to 3 pounds and water to about 8 cups rather than forcing the recipe into the crock.
USDA’s slow cooker food-safety guidance recommends beginning with a clean cooker and utensils, refrigerating perishables until preparation, thawing meat or poultry before slow cooking and keeping the lid in place.
How to make chicken bone broth in a slow cooker
1. Heat the oven
Preheat the oven to 425°F. Line a rimmed baking sheet with foil for easier cleanup or use an unlined sturdy roasting pan.
Keep raw chicken separate from produce and ready-to-eat food. Wash hands, utensils and work surfaces with hot soapy water after contact.
2. Roast the bones and vegetables
Arrange thawed chicken parts in one layer. Add onion, carrots, celery and garlic around them without overcrowding.
Roast for 25 minutes. Turn the chicken pieces and vegetables, then roast 15 to 20 minutes more, until browned in spots. The meat does not need to be fully tender at this stage, but avoid blackened vegetables because they can make the broth bitter.
Roasting is a flavor step. For a pale broth, skip it and place the thawed raw ingredients directly into the slow cooker, then be especially careful not to taste until the poultry has cooked safely.
3. Deglaze the roasting pan
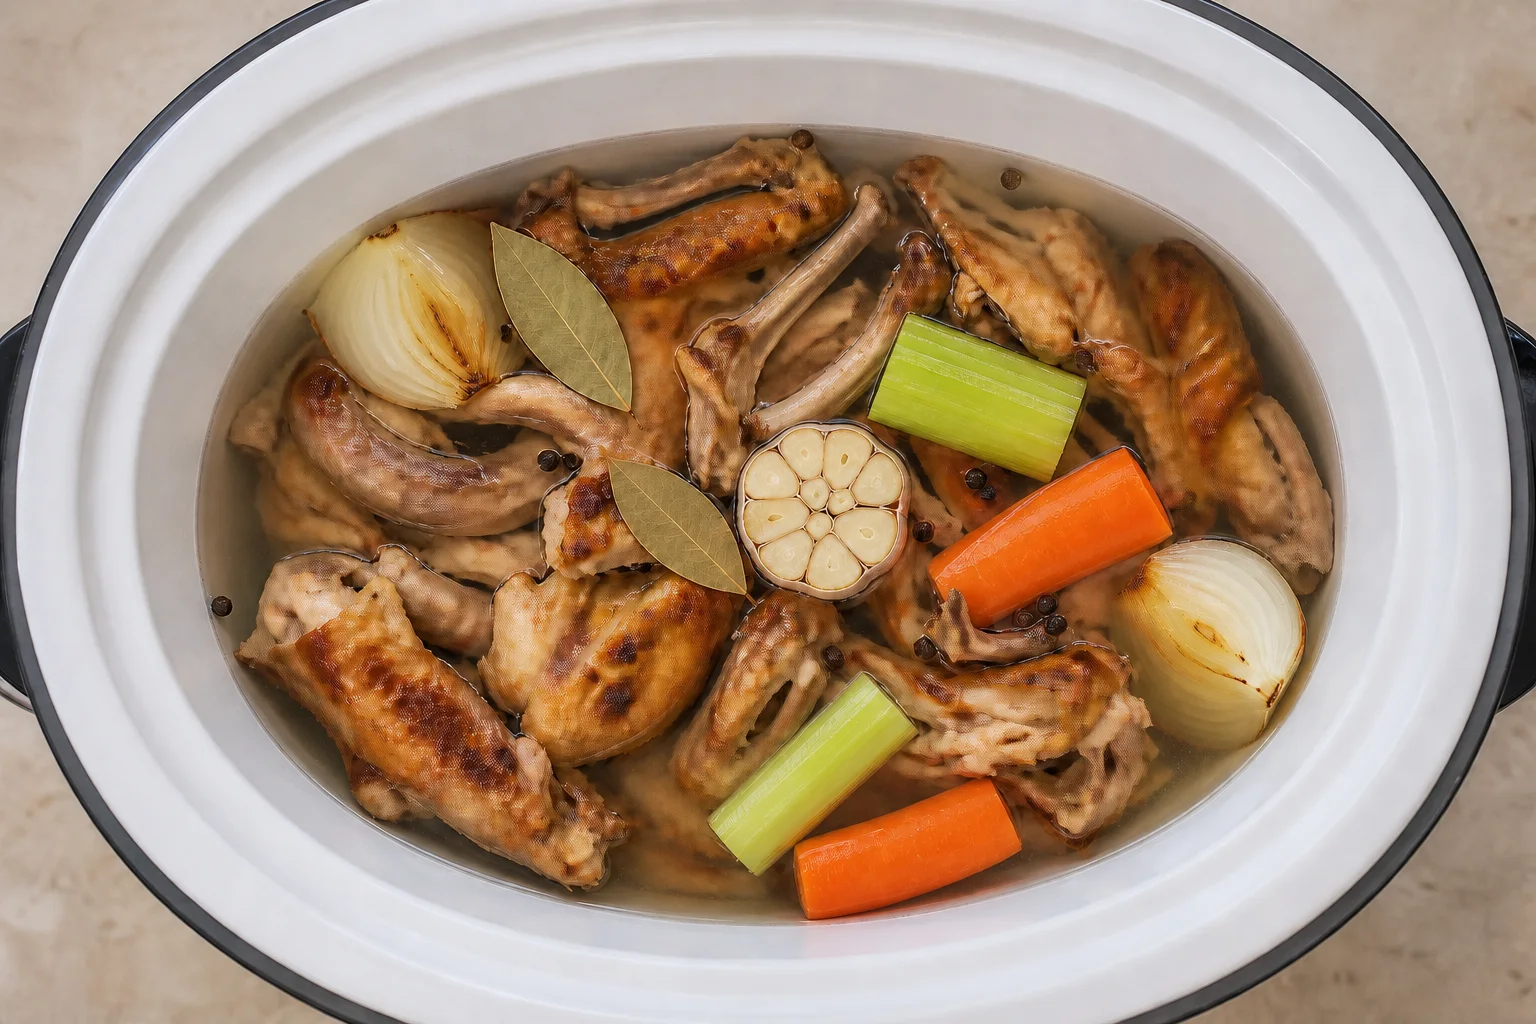
Transfer roasted chicken and vegetables to the slow cooker with clean tongs. Pour 1 cup of the measured water into the hot roasting pan and scrape up the brown bits with a wooden spoon.
Pour this liquid into the cooker. Do not use charred black residue.
4. Add aromatics and measured water
Add bay leaves, peppercorns and vinegar if using. Pour in the remaining measured water. The bones should be barely covered or have some tips just above the surface.
If 10 cups exceed the slow cooker’s maximum line, stop at the line rather than using all the water. If the bones remain substantially exposed, rearrange them before adding up to 1 extra cup.
5. Start on high
Cover and cook on high for 1 hour. Do not lift the lid to stir. The direct heat, steam and covered environment work together; opening the cooker slows heating.
After the first hour, the liquid should be hot and beginning to steam around the edges. If the cooker remains barely warm or appears not to operate, transfer the food promptly to a working cooking appliance rather than continuing in a malfunctioning unit.
6. Continue on low
Switch to low and cook, covered, for 12 to 18 hours. Twelve hours produces a useful cooking broth; 16 to 18 hours yields a more concentrated roasted flavor.
Do not extend indefinitely. Very long cooking can make vegetables bitter and create an overly oxidized flavor. Keep the cooker operating continuously; do not use a delayed start for raw poultry.
7. Strain gently
Turn off the cooker. Use tongs or a slotted spoon to remove large solids to a discard bowl. Set a fine-mesh strainer over a large heatproof pot and ladle the broth through.
Let liquid drain naturally. Do not mash the cooked vegetables or force bone fragments through the strainer. For extra clarity, strain a second time through a clean damp cheesecloth or a coffee filter designed for the volume.
Discard the exhausted bones and vegetables. Do not feed cooked chicken bones to pets; cooked bones can splinter.
8. Season or reduce
Taste safely with a clean spoon. Add up to 1 teaspoon kosher salt if the broth will be served as-is. Leave it unsalted or lightly salted when it will become an ingredient.
For stronger flavor, simmer the strained broth uncovered in a wide pot on the stovetop until reduced by 15 to 25 percent. Do not reduce in an unattended slow cooker after the solids are removed; a wide stovetop pot is faster and easier to monitor.
9. Cool rapidly
Divide hot broth among shallow heatproof containers, leaving lids ajar while steam escapes briefly. An ice-water bath around the containers speeds cooling; stir the broth with a clean utensil while keeping sink water outside the food.
Refrigerate promptly and within 2 hours. USDA advises cooling large amounts in shallow containers because a deep pot of soup or broth takes too long to cool. Do not put the heavy hot ceramic crock into the refrigerator.
Slow cooker bone broth time
After roasting, cook for 1 hour on high plus 12 to 18 hours on low. The range changes flavor and concentration more than safety once the contents have cooked thoroughly.
| Low-stage time | Expected character | Best use |
|---|---|---|
| 12 hours | Lighter roasted flavor, moderate body | Soups and rice |
| 15 hours | Rounded savory flavor, fuller body | All-purpose cooking broth |
| 18 hours | More concentrated flavor, strongest likely gel | Sipping or sauces |
A firm gel is never guaranteed. Bone composition and water ratio matter more than adding several extra hours. If the strained broth tastes weak, reduce it on the stovetop instead of cooking the spent vegetables longer.
How to get broth that gels when cold
Use collagen-rich pieces such as wings, necks, backs and joints. A pile of large bare marrow bones can add flavor but may not create the same gelatin structure as connective tissue.
Measure water so it barely covers the bones. Adding extra water “to fill the cooker” dilutes both flavor and gelatin.
Avoid topping up throughout cooking unless ingredients are scorching because of an appliance problem. A covered slow cooker loses little water.
Chill the broth completely before judging gel. Gelatin sets in the refrigerator and melts again when warmed. A broth that remains liquid can still taste excellent and work perfectly in cooking.
For a weak but flavorful broth, reduce it by 20 to 30 percent after straining, cool it again and reassess. Reduction concentrates gelatin that is already present; it cannot create collagen that was absent from the bones.
How to keep bone broth clear
Roasting makes this broth darker by design, but it does not have to be muddy. Use a gentle slow-cooker heat, keep the lid closed and strain without pressing.
Do not stir the soft bones and vegetables during the last hours. Agitation breaks them into fine particles. Avoid blending or squeezing the solids.
A little cloudiness is not a safety problem. It reflects suspended protein, fat or vegetable particles. For a polished clear result, chill the strained broth, lift off solid fat and pass the cold liquid through damp cheesecloth before reheating.
Removing and saving the fat
After refrigeration, rendered chicken fat rises and firms on top. Lift it off with a spoon. Leave a thin layer for richness or remove most of it for a cleaner-tasting broth.
The rendered fat can be refrigerated separately and used for roasting potatoes or sautéing vegetables within about 4 days. If it contains water or broth, expect more sputtering than from clarified fat.
Do not try to remove all hot fat with paper towels while the broth is in the cooker. Chill first for safer and more complete separation.
Cooked-carcass variation
Use two refrigerated carcasses from plain roasted chickens, removing stuffing, citrus halves and most skin. Break them only enough to fit below the fill line; avoid creating sharp fragments.
Skip oven roasting unless the carcasses are pale. Add the same vegetables, aromatics and 9 cups water because cooked carcasses are often less bulky. Start on high for one hour, then cook on low for 10 to 14 hours.
Only use bones that were refrigerated within 2 hours of the original meal and kept cold. Discard a carcass that sat out too long rather than attempting to make it safe through extended cooking.
Troubleshooting
The chilled broth did not gel
The bones had little connective tissue, the water ratio was high or the broth was not reduced. It is still usable. Reduce on the stovetop for stronger body, or use more wings, necks and joints next time.
The broth tastes bitter
Vegetables or browned bits burned, too many bay leaves were used or the slow cook continued too long. Do not scrape black residue into the cooker. Two bay leaves and an 18-hour low-stage maximum keep bitterness in check.
The broth is cloudy
The solids were stirred, pressed or allowed to break apart. Strain gently through a fine mesh, then through damp cheesecloth if appearance matters. Cloudiness alone does not make it unsafe.
The broth tastes weak
Too much water was added or the bones were mostly bare. Simmer the strained broth uncovered in a wide pot until the flavor concentrates. Add salt only after reduction.
The broth is greasy
The batch contains substantial skin and fat. Chill completely and remove the solid fat cap. Next time trim large fat pockets before roasting.
The broth is too salty
The bones were previously seasoned, packaged broth replaced water or salt was added before reduction. Dilute with unsalted water and keep future batches unsalted until the end.
The slow cooker lost power
If no one was home during the outage, USDA advises discarding the food even if it looks done. If you were present, move it promptly to another working heat source and follow official power-outage guidance.
Ways to use chicken bone broth
Use it as the liquid for chicken soup, rice, risotto, beans, lentils, gravy or pan sauce. Reduce it for a concentrated base, then dilute as needed in the final dish.
For sipping, heat one cup to steaming and season with salt, lemon, ginger or herbs. Do not assume homemade broth has a fixed protein, collagen or mineral content; exact composition varies widely by bones and concentration.
Freeze some in 1-cup portions for recipes and some in ice-cube trays for sauces. Clearly label the date and volume so concentrated broth is not mistaken for ready-to-use stock.
Storage, freezing and reheating
Refrigerate broth in shallow covered containers and use within 3 to 4 days, following the FoodSafety.gov cold-storage chart. Keep the refrigerator at 40°F or below.
Freeze for 2 to 3 months for best quality. Leave headspace in rigid containers because liquid expands, or freeze flat in leakproof bags after the broth is fully cold.
Thaw in the refrigerator or reheat from frozen in a saucepan. Bring broth, soup, sauce or gravy to a rolling boil when reheating, following USDA leftover guidance. Do not use a slow cooker to reheat cold leftovers; heat them rapidly first, then move hot food to a preheated slow cooker for holding.
Frequently asked questions
Can I make bone broth from a rotisserie chicken carcass?
Yes, if the carcass was refrigerated within 2 hours. Remove most skin and strongly seasoned pieces, use less initial salt and follow the cooked-carcass timing.
Do I have to roast the bones?
No. Roasting creates darker color and deeper flavor. Unroasted bones make a paler, cleaner-tasting broth.
Is apple cider vinegar necessary?
No. Two teaspoons add mild acidity, but the broth works without it. More vinegar does not guarantee gel and can make the flavor harsh.
How long should bone broth cook in a Crock-Pot?
Use one hour on high followed by 12 to 18 hours on low for this recipe. Keep the lid closed and the appliance running continuously.
Why is my bone broth liquid when cold?
The batch may contain less connective tissue or more water. It is still useful. Reduce it for stronger body, or use more wings, necks and joints in the next batch.
Can I leave bone broth in the slow cooker to cool overnight?
No. Divide it into shallow containers and refrigerate promptly within 2 hours. A switched-off slow cooker cools too slowly.
Can I reuse the cooked bones?
The second batch will be substantially weaker and the soft bones can fragment. Discard the spent solids after one long extraction, and never give cooked poultry bones to pets.
Printable recipe card

Rich Slow Cooker Chicken Bone Broth Recipe
Ingredients
Equipment
Method
- Heat the oven to 425°F. Keep thawed raw chicken separate from ready-to-eat food.
- Arrange chicken, onion, carrots, celery and garlic on a rimmed pan. Roast 25 minutes, turn, then roast 15 to 20 minutes more until browned but not blackened.
- Transfer solids to a 6-quart slow cooker. Deglaze the pan with 1 cup measured water and add the brown liquid.
- Add bay leaves, peppercorns, vinegar and remaining water, staying below the maximum fill line and barely covering the bones.
- Cover and cook on high for 1 hour without lifting the lid.
- Switch to low and cook, covered, for 12 to 18 hours.
- Remove large solids and strain gently without pressing. Season lightly or reduce on the stovetop if desired.
- Divide into shallow containers and refrigerate promptly within 2 hours.
Notes
- Use fully thawed chicken and keep the slow cooker below its maximum fill line.
- Do not taste until the poultry has cooked safely; keep the covered cooker operating continuously.
- Cold-set gel varies with connective tissue, water and concentration and is not a safety test.
- Cool in shallow containers rather than in the ceramic crock.
- This recipe was developed through culinary research and editorial review.
This recipe was developed through culinary research and editorial review. Bone composition, water ratio and reduction vary, so gel strength and nutrient content cannot be guaranteed; follow the stated heating and rapid-cooling practices.
Nutrition is a rough estimate for one cup because homemade bone broth varies substantially with bones, fat removal, water and reduction.